Setting up Provider Appointments allows you to customize the look of your appointment book.
-
Click Setup on the top toolbar.
-
Click Appointments on the left toolbar.
-
Click Provider Appointments on the left toolbar.
-
Under the "Display" tab the name and ID‟s for each employee setup as a provider will be displayed.
-
Place a check in the “Display in Appointment Screen” column for them to be displayed in appointment book.
-
Select the Display Order for the Service Provider. This is the number that they will be displayed in. If none are selected SalonTouch will automatically put them in to alphabetical order.
- You can customize the coloring of the individual provider's appointment columns. Select “Label Color” and “Font Color” to be used in appointment book, you may want to make each Provider Group the same colors.
- Place a check mark under “Allow Double Booking” for that provider. This will allow a provider to schedule two appointments at the same time.
-
Click “Save”.

- Click the "Booking Schedule" tab.
- Under the “Booking Schedule” enter in the requested information that appointments are not to be made.
- Click Save.

- Under the “Fees” tab enter in fees your employees would like to charge for “No show Fees” and Late Fees”

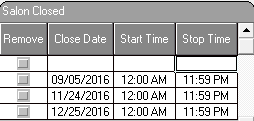
- Use the “Salon Closed” feature to not allow appointments to be made when the salon is closed on specific days.
- Click Save.
SalonTouch Studio - Setting up providers in Appointment Book:
Was this article helpful?
That’s Great!
Thank you for your feedback
Sorry! We couldn't be helpful
Thank you for your feedback
Feedback sent
We appreciate your effort and will try to fix the article